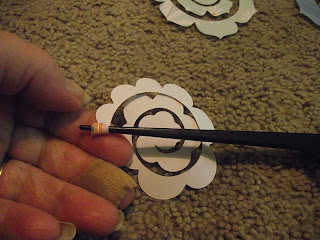
This is what I start with. the smallest dowels and the sizes 2 in flower, 3 in flower and a 4 in flower. Plus rat tail comb and a glue stick.
When I'm ready to start I just start rolling the back side of the flower up on the tinyest part of the tail of the comb.
This doesn't take long at all to roll up as tight as you can on the tinyest part of the comb. this is the 3 in flower and I want it tight so it looks like a rose bud.
After it is all rooled up then I fuff the flower to loose it up just a little then I set it up to be glued down.
Then after it is glued I like to hold it down for a few mintures just to make sure the flower will stay where I put it.
The finished Rose Bud (2 in)
Then I start the three inch just like you did the two inch. Just keep using the comb on this one until it is done.
Then you glue the flower down and hold it until it is set then let it rest for a while before you move it.
Side view of the 2 and 3 inch flower.
This one is the 4 inch and I started with the comb and because I didn't want this one a tight. After I started with the comb I took the comb out and finished rolling with my fingures. I was looking for a loose look of this flower.
This is the finished look of all three of them. Started from left to the right is the 2 inch, 3 inch, and then the 4 inch. I still want to try the small one and put it into the big one and see what it turns out. If I like it I will show you.
The things I used.
Thank you all for help and thank you for being my friends and coming by. If you like this please leave me a comment.
Donna Scrapp'n Nanahttp://scrappnana.blogspot.com/
www.mycmsite.com/dmdegraw
Come and see what are the NEW TOOLS are for July. A New System


